Important Note – April 2025 #
With Firefox version 137.x (and higher) Mozilla has changed the way it handles HTTPS certificates. Now, the browser recognizes the certificate store of the operation system (the same as all other browsers do). Therefore a separate installation of the eBlocker certificate in Firefox, as described below, is no longer necessary.
To install the eBlocker certificate for Firefox just follow the certificate installation for your OS:
👉 Certificate installation on Windows
👉 Certificate installation on macOS
👉 Certificate installation on Linux
👉 Certificate installation on iOS / iPadOS
The installation instructions below are for Firefox 136 (and lower) only.
With just a few steps you can enable your Firefox, Cliqz or Seamonkey for eBlocker HTTPS. You can use eBlocker’s HTTPs-wizard or the device Dashboard to add eBlocker’s certificate. Here we show the process step-by-step using the Dashboard in the following instructions:
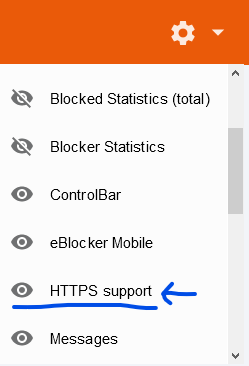
Add HTTPS support via Dashboard #
In the desired browser open the eBlocker the eBlocker Dashboard (using http://eblocker.box) and make sure the Dashboard tile HTTPS is visible. If it’s not shown, check the menu under the gear.
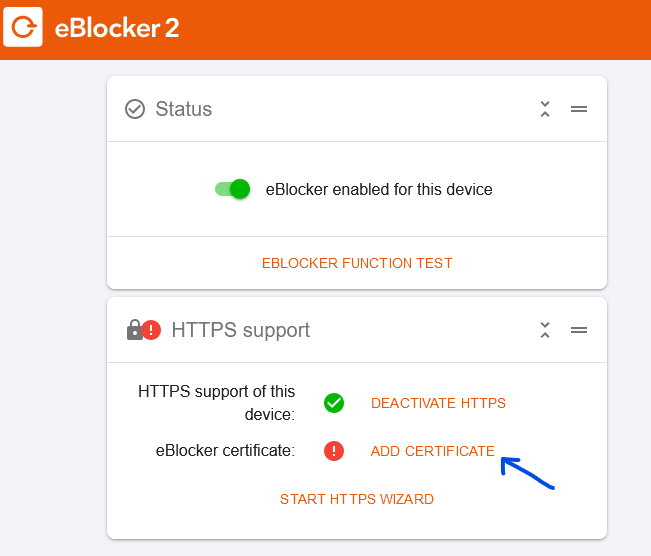
In the Dashboard tile “HTTPS support” click ADD CERTIFICATE:
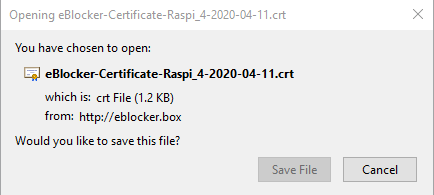
Save the certificate to a file #
Save the file (the certificate) to your browser’s download folder:
Import the certificate to browser’s certificate store #
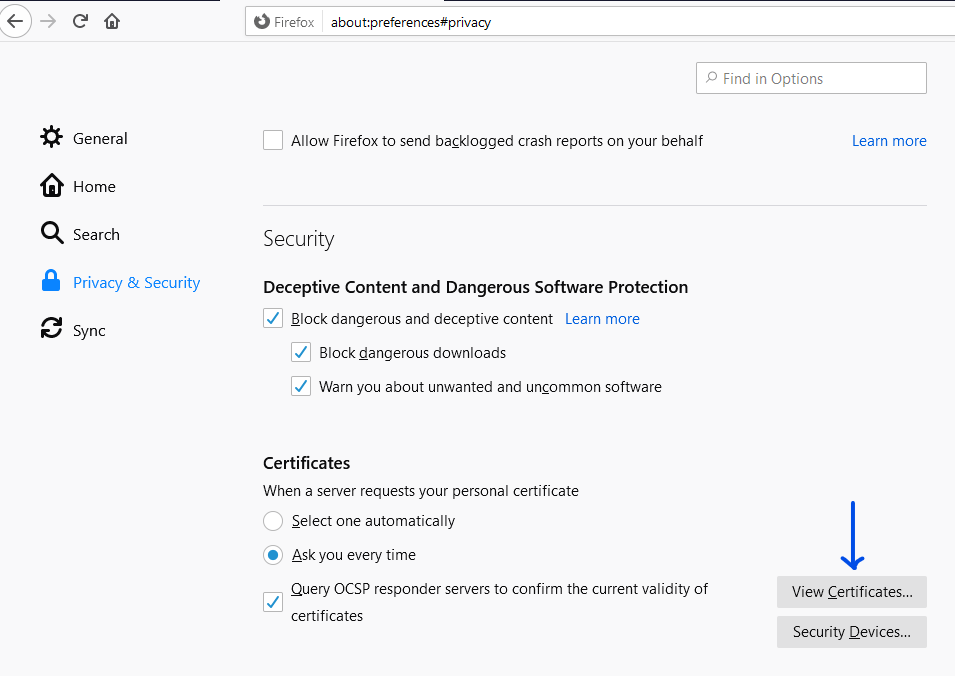
Open the browser preferences and scroll down to Privacy & Security and click the button “View Certificates”:
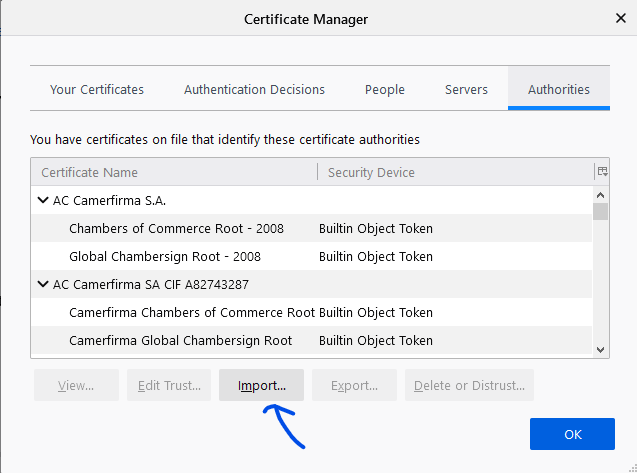
The Firefox certificate manager will pop up. Make sure to select the tab “Authorities” and click “Import” as shown:
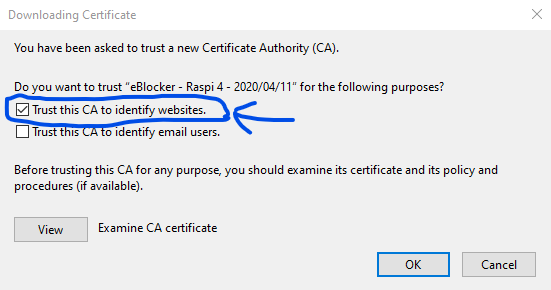
Now select the just downloaded certificate from your download folder. In the following dialog make sure the first checkbox Trust this CA to identify websites is selected and click OK. Done: Your browser is enabled for eBlocker HTTPS.
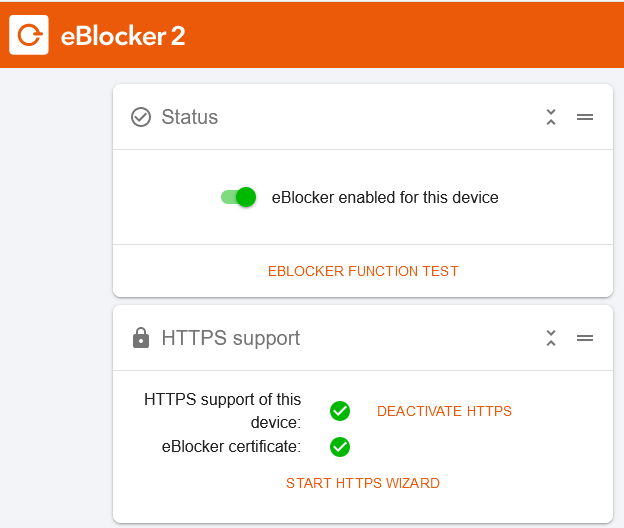
Verify HTTPS support is enabled #
Now this browser can use eBlocker HTTPS. The Dashboard tile will indicate the correct installation – after a few minutes. Please wait for a least two minutes as the test might take a while:
Important: These instructions also apply to the Android Firefox browser (see note below), but not for the iOS Firefox browser.
Android 11 and Firefox certificate install #
A user reported „I think for the Firefox 94.1.2 browser in Android 11 I have found the solution. Settings -> via Firefox -> tap 5 times on the logo (debug mode is started) -> in the menu one step back -> Secret Settings -> Use third party CA certificate = true. Now Firefox trusts the certificate you installed before.“
Adding the certificate in Thunderbird #
For adding the eBlocker certificate to Mozilla Thunderbird (e-mail client), follow the process above until you have saved the certificate. Then switch to Thunderbird and go to the Thunderbird Preferences. Follow the process as described above using the Thunderbird Preferences instead of Firefox preferences.